How to manually push images to your KubeOps-Registry project space
less than a minute
How to manually push images to your KubeOps-Registry project space
To manually push container images into your KubeOps-Registry project space, you need to use your Harbor CLI secret for authentication when using podman.
How to get your CLI secret
-
Click on your username and select User Profile.
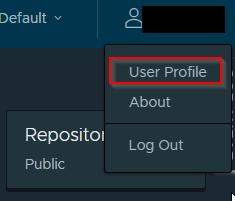
-
On the User Profile page, you can copy or change your CLI secret if needed.
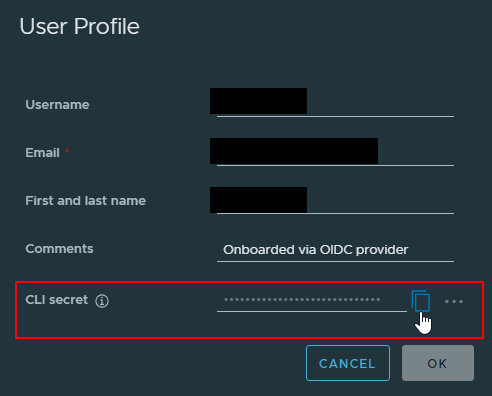
Now you can push your image using the CLI secret:
podman login registry.kubeops.net -u <username> -p <CLI_secret>
Note: Replace
<username>with your KubeOps username and<CLI_secret>with your actual CLI secret.
How to push your image
After logging in, tag your image with the registry path of your KubeOps-Registry project space:
Important: In most cases, you do not need to push images manually. You can specify a local or remote image directly in your KOSI package, for example
docker.io/library/nginx:latestormy-app:v1.12.1. When KOSI pushes the package, it rewrites the image reference in the package to the pushed registry image underregistry.kubeops.net. After that, you can use the rewritten and pushed image in your KOSI package.
Note: Replace
<local_image>,<project>,<image>and<tag>with your actual values.
podman tag <local_image>:<tag> registry.kubeops.net/<project>/<image>:<tag>
Example:
podman tag my-app:v1.12.1 registry.kubeops.net/my-project/my-app:v1.12.1
Then push the image to your project space:
podman push registry.kubeops.net/<project>/<image>:<tag>
Example:
podman push registry.kubeops.net/my-project/my-app:v1.12.1